Original windows are the fingerprints of an older home, shaped by decades of weather, workmanship, and use. Restoring them thoughtfully can reclaim lost efficiency while preserving the trim profiles, wavy glass, and joinery that replacement units often ignore. This guide walks you through targeted steps to assess condition, remove failed coatings, repair glazing, and tighten up air leaks with modern materials. You’ll see why restoration is often a smarter environmental and financial decision than replacement, especially when done with compatible products and careful sequencing. If you’re ready to Explore More than a simple paint-over, the following sections show how to combine craft and science to improve performance without sacrificing character.
Assessing the Condition of Aging Frames and Glass Panels
A solid plan starts with a systematic evaluation of each window’s frame, sash, and glass. Look for paint failure patterns, loose joints at the rails and stiles, cracked or rattling panes, and signs of water intrusion such as dark staining or soft wood. Use a small awl to probe suspected rot and a moisture meter to quantify dampness, especially at sills and lower rails where water tends to sit. Check how the sashes operate: do they bind, drop, or drift? Note weatherstripping condition, sash cord wear, putty hardness, and any gaps between casing and wall that might compromise air sealing—a baseline that informs How To Restore Old Windows effectively.
Signs of Structural Fatigue
Before you unfasten anything, examine the sill slope and inspect for flashing failures above the window that might be feeding leaks. Run a straightedge along the meeting rails to spot sagging or twist, and gently tap the glass to detect loose points. Hairline cracks in glass may be stable, but edge chips near the rabbet often worsen under stress and temperature swings. Test the integrity of old-growth wood: if it’s dense and largely sound, consolidation and repair will likely outperform replacement. Document with labeled photos so you can track each sash, staff bead, and parting stop during disassembly and reassembly.
Removing Old Paint and Damaged Putty Without Harm
Safely stripping failed coatings and putty sets the stage for durable repairs without scarring the wood or glass. On pre-1978 homes, assume lead-based paint and follow containment protocols: plastic sheeting, a HEPA vacuum, and wet methods to control dust. Infrared heaters and steam are gentler than open-flame torches, softening paint and glazing so they release without scorching fibers or cracking panes. Keep heat under control—excess temperatures can cause glass breakage and volatilize old finishes. Once softened, use sharp scrapers and putty knives to lift layers cleanly, taking care not to gouge the rabbet or crush glazing points.
Safe Removal Methods
When dealing with stubborn coatings, choose modern, low-toxicity gel strippers based on benzyl alcohol or dibasic esters, which cling to vertical surfaces and reduce fumes. Protect the glass with *foil-faced cards* or painter’s tape while you work the putty out in small sections, preserving intact glazing points where possible. If you encounter rock-hard compounds, a steam box or infrared pad focused on the perimeter will often loosen the bond in minutes. After removal, lightly sand to a uniform surface, then wipe with mineral spirits or denatured alcohol to clear residue. Treat bare wood with a penetrating primer or linseed oil wash to prevent flash dry of the new glazing and ensure better adhesion—smart sequencing that defines How To Restore Old Windows without collateral damage.
Repairing Glazing and Reinforcing Historic Window Frames
With bare, sound wood exposed, turn to rebuilding the weather skin and structural connections. Start by oil-priming the rabbets and back-bedding a thin layer of glazing compound before setting the pane—this seals the interface against capillary moisture. Set glass with appropriately spaced glazing points, then tool an even beveled line that meets the sightline of the muntin or sash frame. Allow the compound to skin before priming and painting to a fine edge on the glass; that tight paint line is part of the weather seal. Meanwhile, evaluate joints for looseness: if rails or stiles wiggle under hand pressure, strengthen them before reinstalling the sash.
Choosing Compatible Materials
Rot repair often succeeds with a two-part epoxy system: a liquid consolidant to stabilize fibers and a paste filler shaped to the original profile once cured. Where loss is extensive, a “Dutchman” patch of matching species wood, set with waterproof glue and mechanical reinforcement, preserves the sash’s historic geometry. Reinforce mortise-and-tenon joints with concealed pegs or stainless screws plugged with tapered wood, maintaining the original sightlines. For long-term function, add discreet weatherstripping—bronze V-spring or silicone bulb in a routed kerf—to reduce rattle and infiltration without altering profiles. A measured approach like this preserves artistry while tightening performance, a balance owners often appreciate when they later Explore More strategies for fine-tuning efficiency.
How Modern Sealants Improve Energy Retention in Vintage Homes
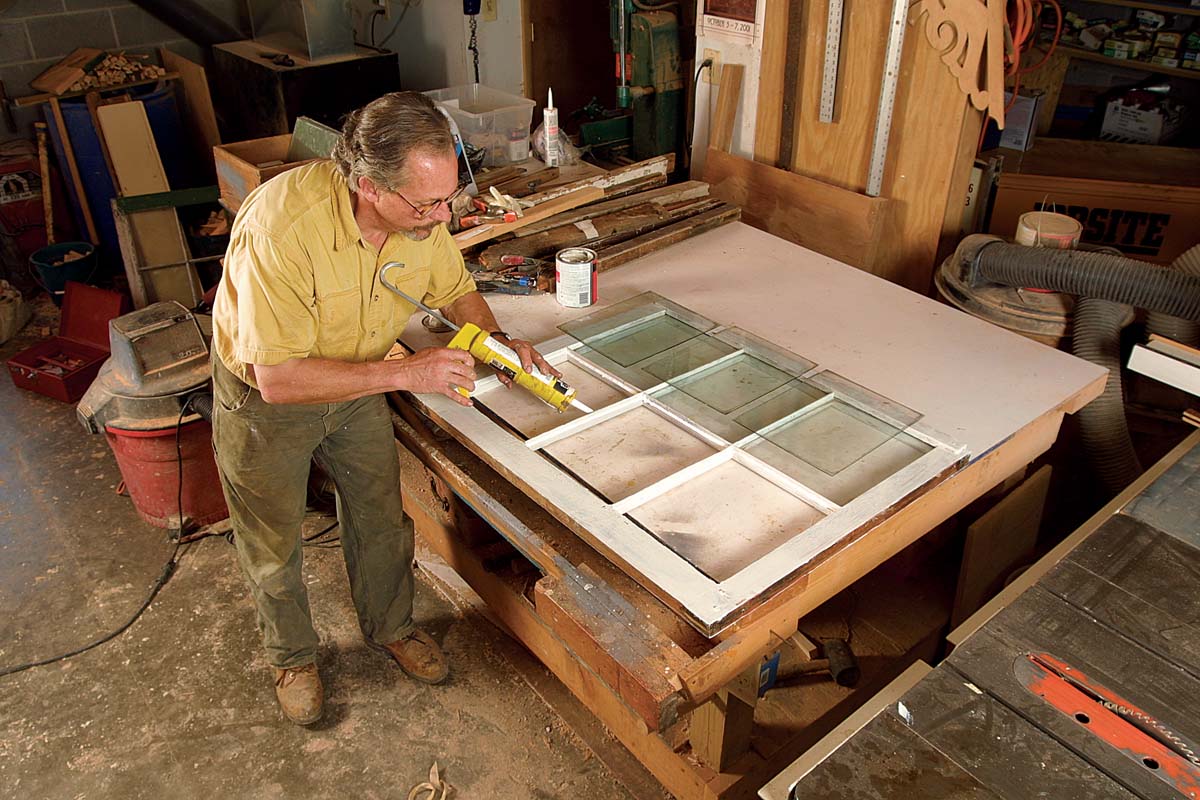
Air leakage steals comfort first and dollars second, and modern sealants are a cost-effective way to close the biggest gaps. Focus on joints where dissimilar materials meet: casing-to-wall, stool-to-apron, and sash-stop interfaces. High-quality sealants not only block drafts but also reduce moisture-driven paint failure by keeping bulk water out of sensitive joints. Select products with the right movement capacity and compatibility for painted wood and masonry. Plan a clean, continuous bead with backer rod where gaps exceed one-quarter inch, and avoid sealing weep paths or necessary drainage routes.
Where and How to Apply Sealants
Neutral-cure silicones and silyl-terminated polymer (MS) sealants offer strong adhesion and UV resistance, while high-end acrylics excel where paintability and vapor permeability matter. Polyurethanes can be excellent but may yellow and are trickier to paint; read the manufacturer’s specifications carefully. On the interior, run a discreet bead around the casing and along the sash weight pockets if you’ve converted to spring balances or sealed the old pulley holes. On the exterior, seal the casing to the siding and the head flashing to the trim to interrupt wind-driven rain. Pair these with weatherstripping and a well-tuned storm window, and you’ll notice immediate gains in energy retention—proof that even small, well-placed seals make vintage windows perform far beyond expectation.
Balancing Preservation With Modern Performance Standards
Historic windows are more than openings; they’re design anchors whose proportions and glass character shape a façade. The goal is not to freeze them in time, but to integrate reversible upgrades that meet today’s comfort expectations. Start by establishing project priorities—air sealing, smooth operation, and durable finishes—then set performance targets informed by local climate and building codes. Many jurisdictions accept restoration combined with storms as an equivalent or superior solution to wholesale replacement. By planning interventions that can be undone, you preserve future options and avoid unintended side effects.
Setting Project Priorities
A typical sequence might be: assess and label, remove sashes, strip, repair wood and glazing, prime, add weatherstripping, reinstall, then fine-tune with storms and sealants. Test fit each sash after reinforcement and before final paint, adjusting parting beads and staff beads to prevent binding. If noise reduction or condensation control is a priority, consider low-e storm panels—interior or exterior—selected to match sightlines and minimize visual impact. Document the process with photos and keep a maintenance log; small seasonal touch-ups keep a good restoration performing for decades. If you want to Explore More options for blending authenticity and efficiency, consult local preservation standards and energy auditors who understand historic assemblies rather than defaulting to replacements.
Environmental and Financial Benefits of Window Restoration
Restoration leverages the embodied energy already in your home’s materials, sidestepping the manufacturing and transport costs of a new unit. Old-growth wood found in many historic sashes resists rot and holds fasteners better than modern softwoods, extending life with modest maintenance. Keeping original frames also reduces landfill waste and the loss of authentic details that can depress curb appeal. From an energy standpoint, a restored window paired with quality weatherstripping and a low-e storm can rival or exceed the performance of many replacements. Comfort gains—fewer drafts, steadier temperatures, quieter rooms—arrive immediately, even before the first utility bill confirms savings.
Cost-Smart Planning
Financially, targeted restoration often pencils out. Labor is the main cost, but it buys longevity: properly repaired windows can serve for generations, with only paint cycles and occasional putty refreshes. Add low-e storms and strategic sealants, and you’ll typically see payback from energy savings and deferred replacement within a reasonable window of ownership. Incentives from preservation groups or local energy programs can shorten that timeline further. For homeowners ready to Explore More nuanced upgrades, combining maintenance planning with annual inspections ensures performance stays high while preserving the irreplaceable charm that made you love the house in the first place.